Campaign Creation Tutorial
This guide will teach you how to use Seshat as a Campaign Manager (the person in charge of assigning annotation tasks and setting the annotation rules).
Before being able to follow this guide, make sure you have a working install of Seshat, and that you have access to a manager’s account.
Creating the Campaign
First, let’s give a bit of context for our example. Let’s say that we have a corpus of audio files that are recordings of ADHD subjects that were orally given a series of three oral tasks designed find out more about their cognitive processes.
We want our annotators to :
- clearly delimit where each task begins and ends, knowing that each of these are in a contiguous sequence. These tasks are named MEMORY, ATTENTION, INVENTION.
- annotate the transcript of the subjects’ speech.
- less importantly, indicate when the interviewer is talking (INT), or if there’s another person talking (OTH),
- indicate if there’s some distinguishable noise at that might decrease the recording’s quality (NOI).
It’s now quite clear that we want annotators to produce a 3-tiered annotation for each audio file, with a 4th optional tier in case the interview is noisy. Let’s get down to work and create our annotation campaign.
First, reach the Campaigns page, and click Add Campaign.

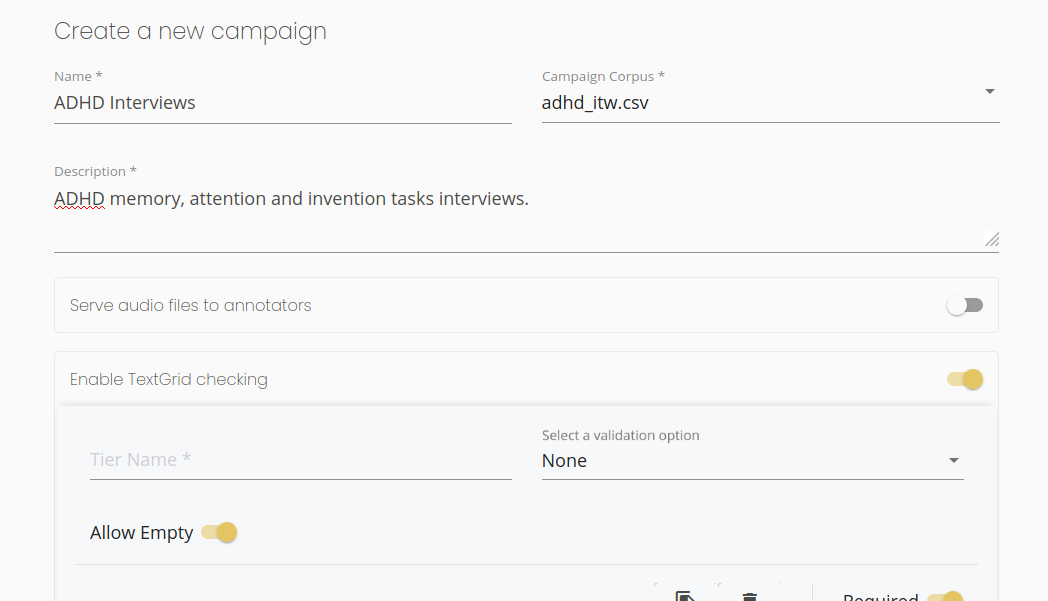
Then, give your campaign a name, a description, select the right corpus, and enable the the textgrid-checking option.
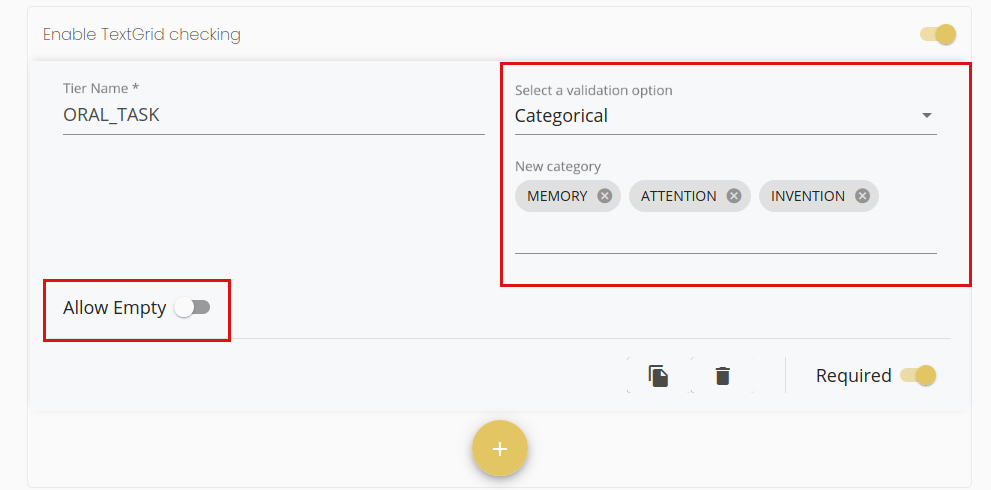
Then, let’s specify a first tier. This one will contain annotations indicating the current oral task for the subject. These task are contiguous, so no “empty annotations” are allowed in this tier. To ensure that this condition is respected by annotators, deactivate the Allow Empty slider. Also, set its Validation options to categorical (with categories MEMORY, ATTENTION, INVENTION).
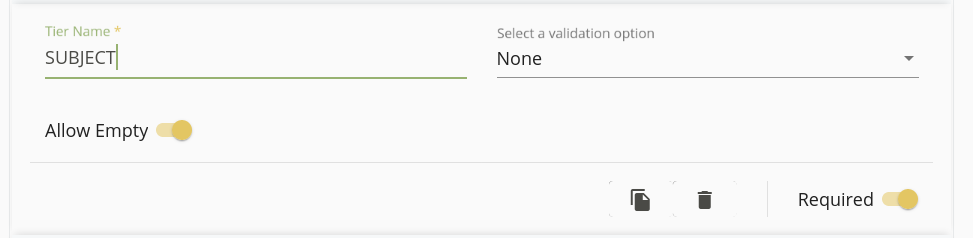
Second, use the “+” button to add another tier. This one, called SUBJECT, will be for the subject’s speech . Annotations for this tier cannot be checked (it’s arbitrary text), thus, leave “Validation Options” to “None”.
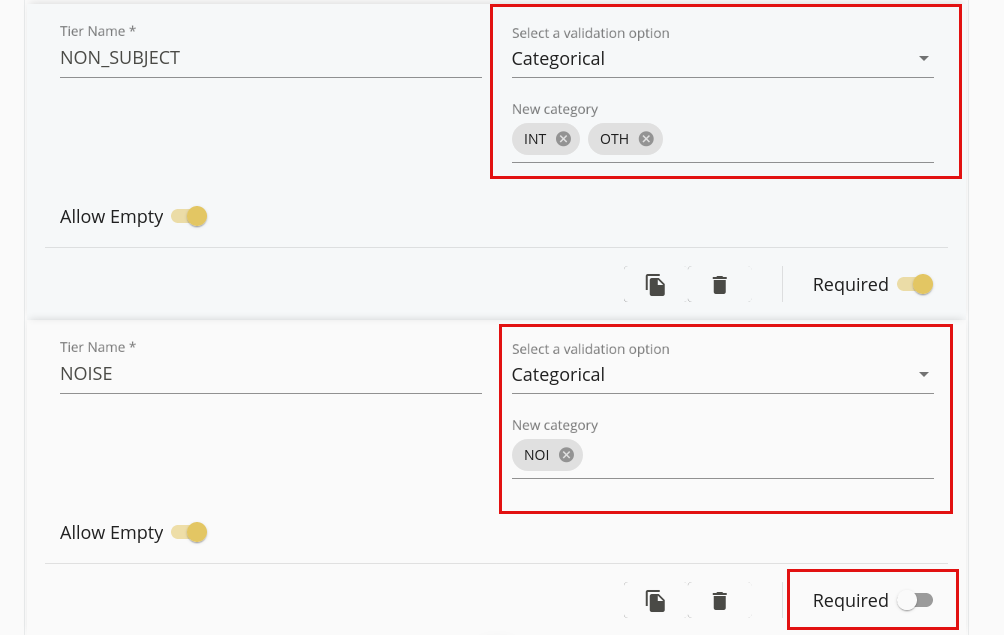
At last, add the two last tiers. The first one, called NON-SUBJECT, will be for INT and OTH annotations. The other one, called NOISE, is for optional NOI annotations, and is not always required. Annotators will thus be able to delete this tier if they consider it to be useless. Thus, deactivate the Required slider.
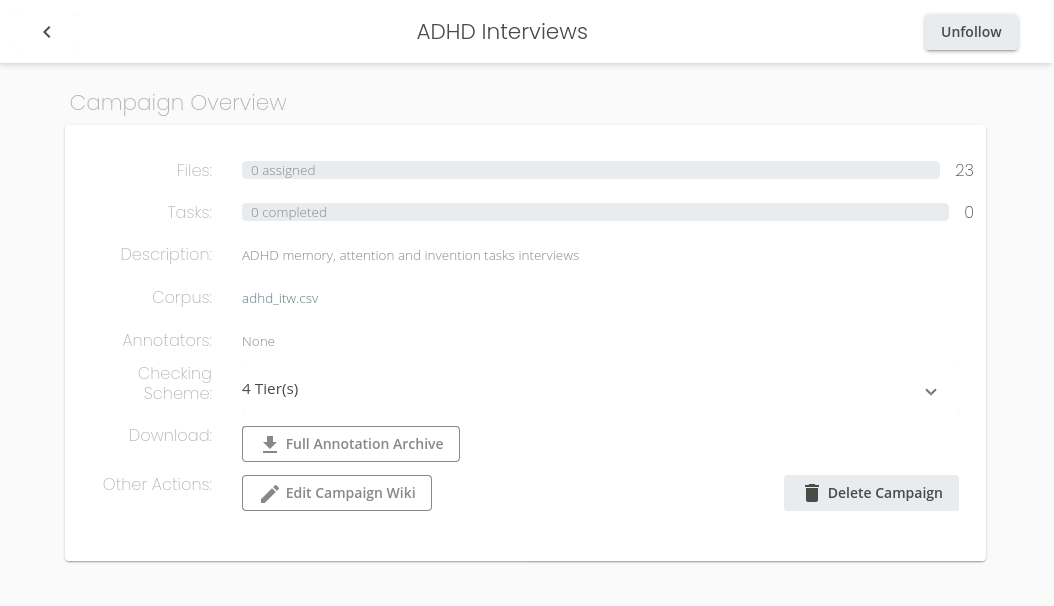
Finally, click Create Campaign to finish the campaign’s creation. You should be redirected to your campaign’s page.
Creating Annotators Accounts
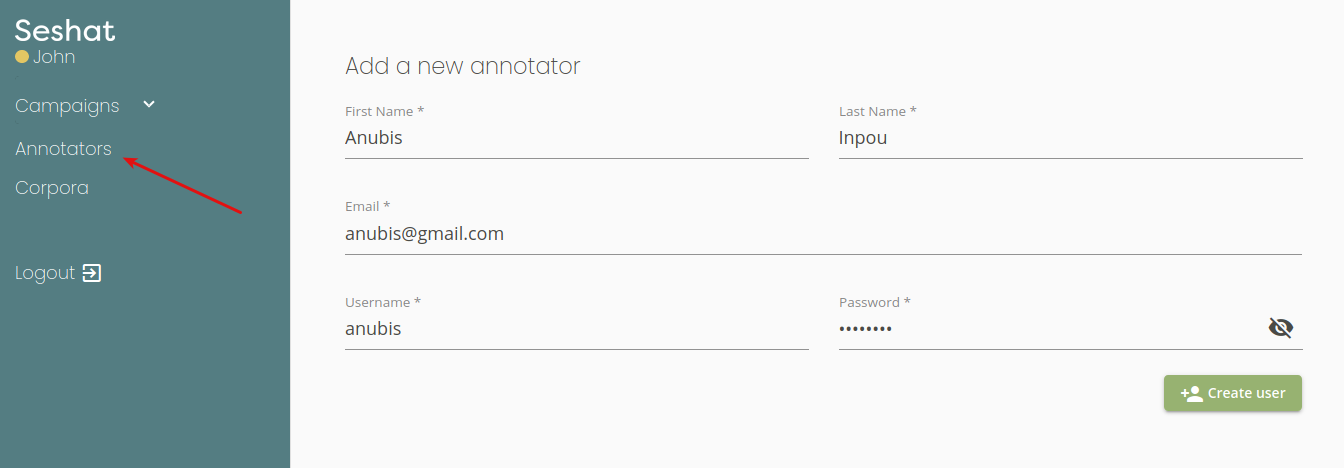
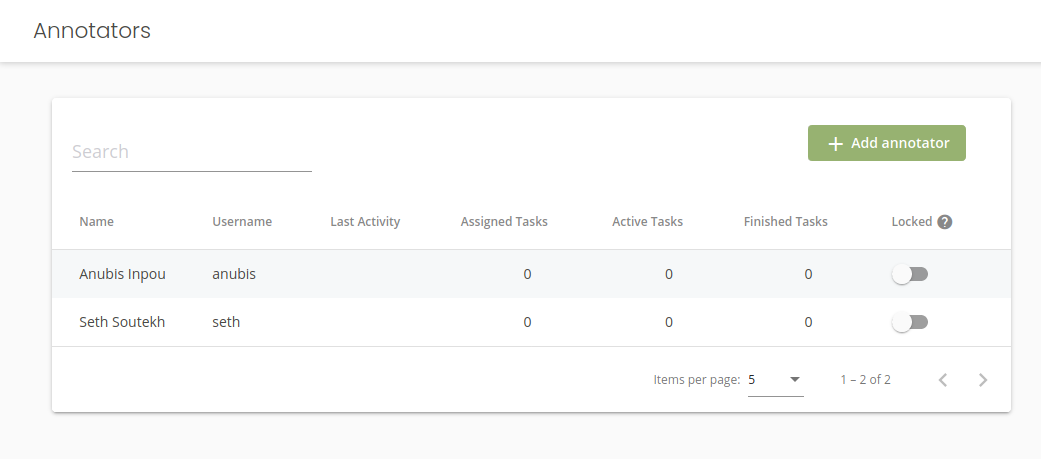
Before being able to add annotation tasks, we first need to create annotators account for our valiant scribes. In our case, we only have two of them: Anubis and Seth. Reach the Annotators page, then click Add annotators to create annotators accounts.
Assigning Tasks
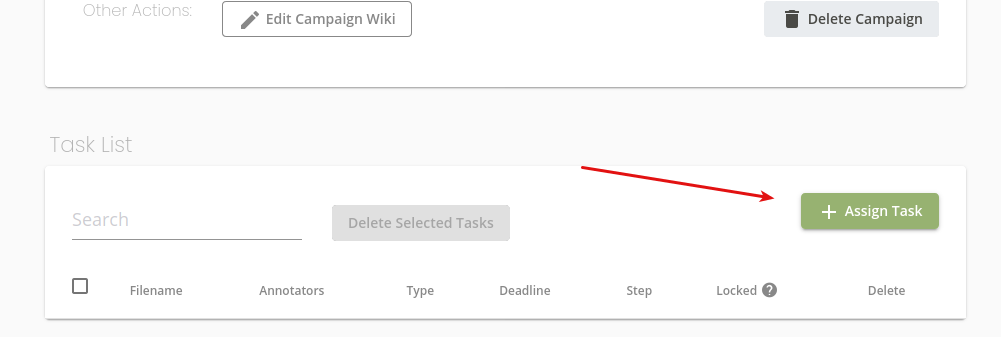
Now, let’s go back to our campaign. Scroll down a bit, and click the Assign task button to create new annotations tasks for your two annotators.
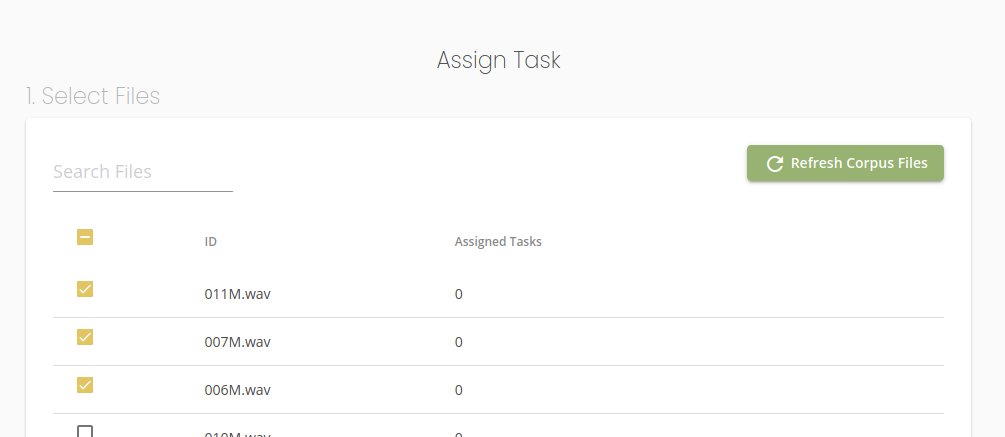
Then, assign 3 annotation tasks to anubis, each naturally corresponding to a different audio file. Select the Single Annotator option and fill-in anubis’s login. The Deadline option can be set as an indicator to help the annotator know what tasks are more urgent, but has no real effect.
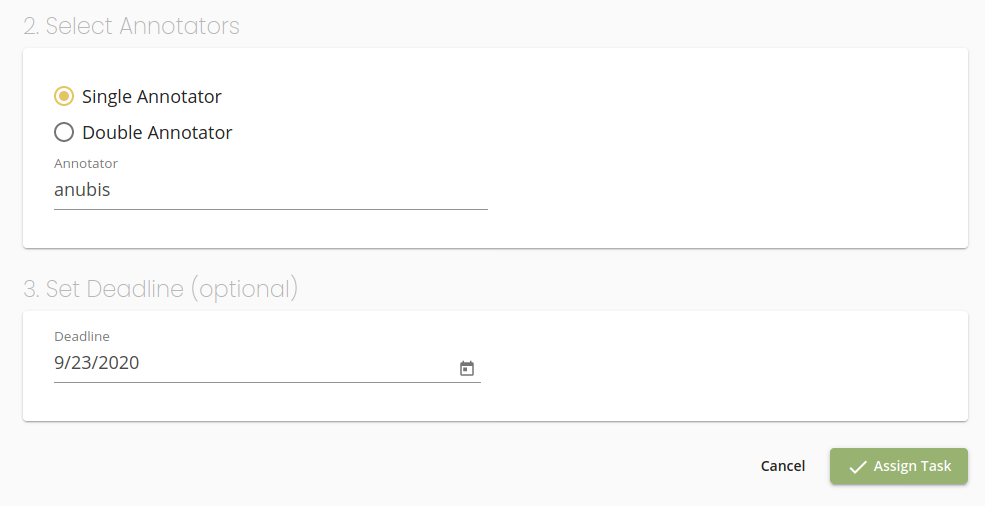
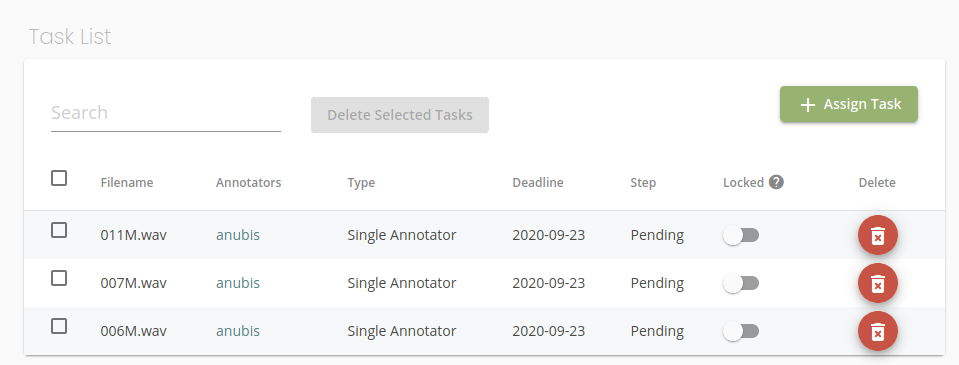
Then, click Assign Tasks. This will create 3 tasks for Anubis. Repeat this process for Seth. this will create a number of tasks that can be viewed in the campaign’s page.
Helping your annotators with the Wiki
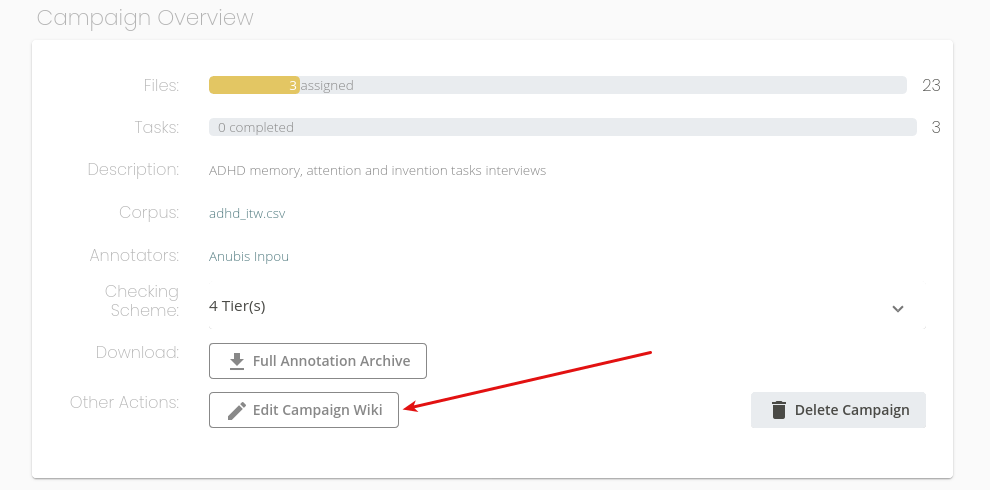
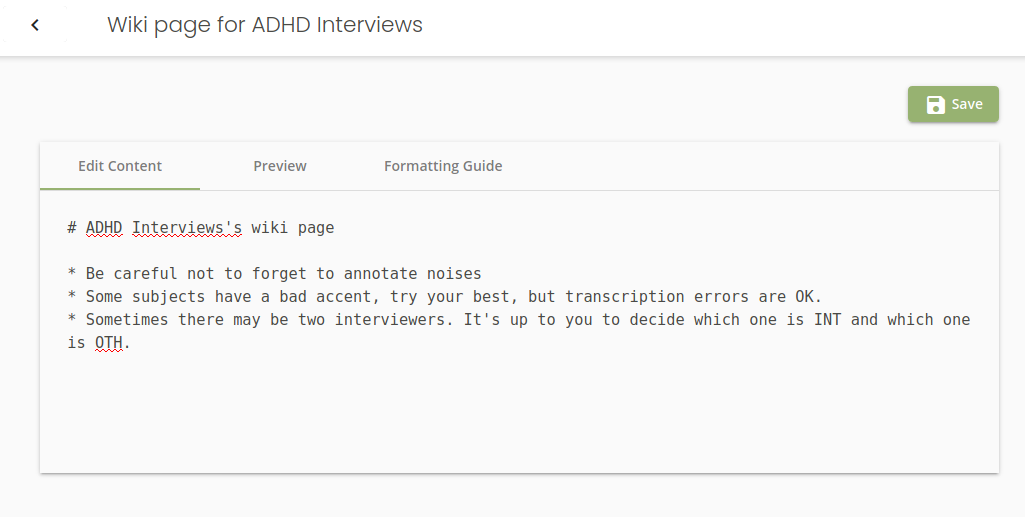
If you want to give your annotators some extra help on how to annotate the audio file, use the Edit Campaign Wiki option. Anything written in the wiki will be displayed in the task’s help, on the annotator’s own interface.
Tracking the Campaign’s Progress
# TODO
Retrieving Annotated Files
At any time during the annotation process, you can download all the annotation files as a nifty ZIP archive by clicking Full Annotation Archive on the campaign’s page